Install
Install Moviola VCam
Your iPhone becomes the camera in Blender. It takes three steps: add the add-on to Blender, get the app on your iPhone, then go back to MOVIOLA for the connection file.
You need Apple Silicon Mac · Blender 5.2 or later · iPhone on iOS 17 or later · Mac and iPhone on the same Wi-Fi
1Add the add-on to Blender
Add the Moviola VCam repository to Blender once, and Blender offers each new version of the add-on as an update.
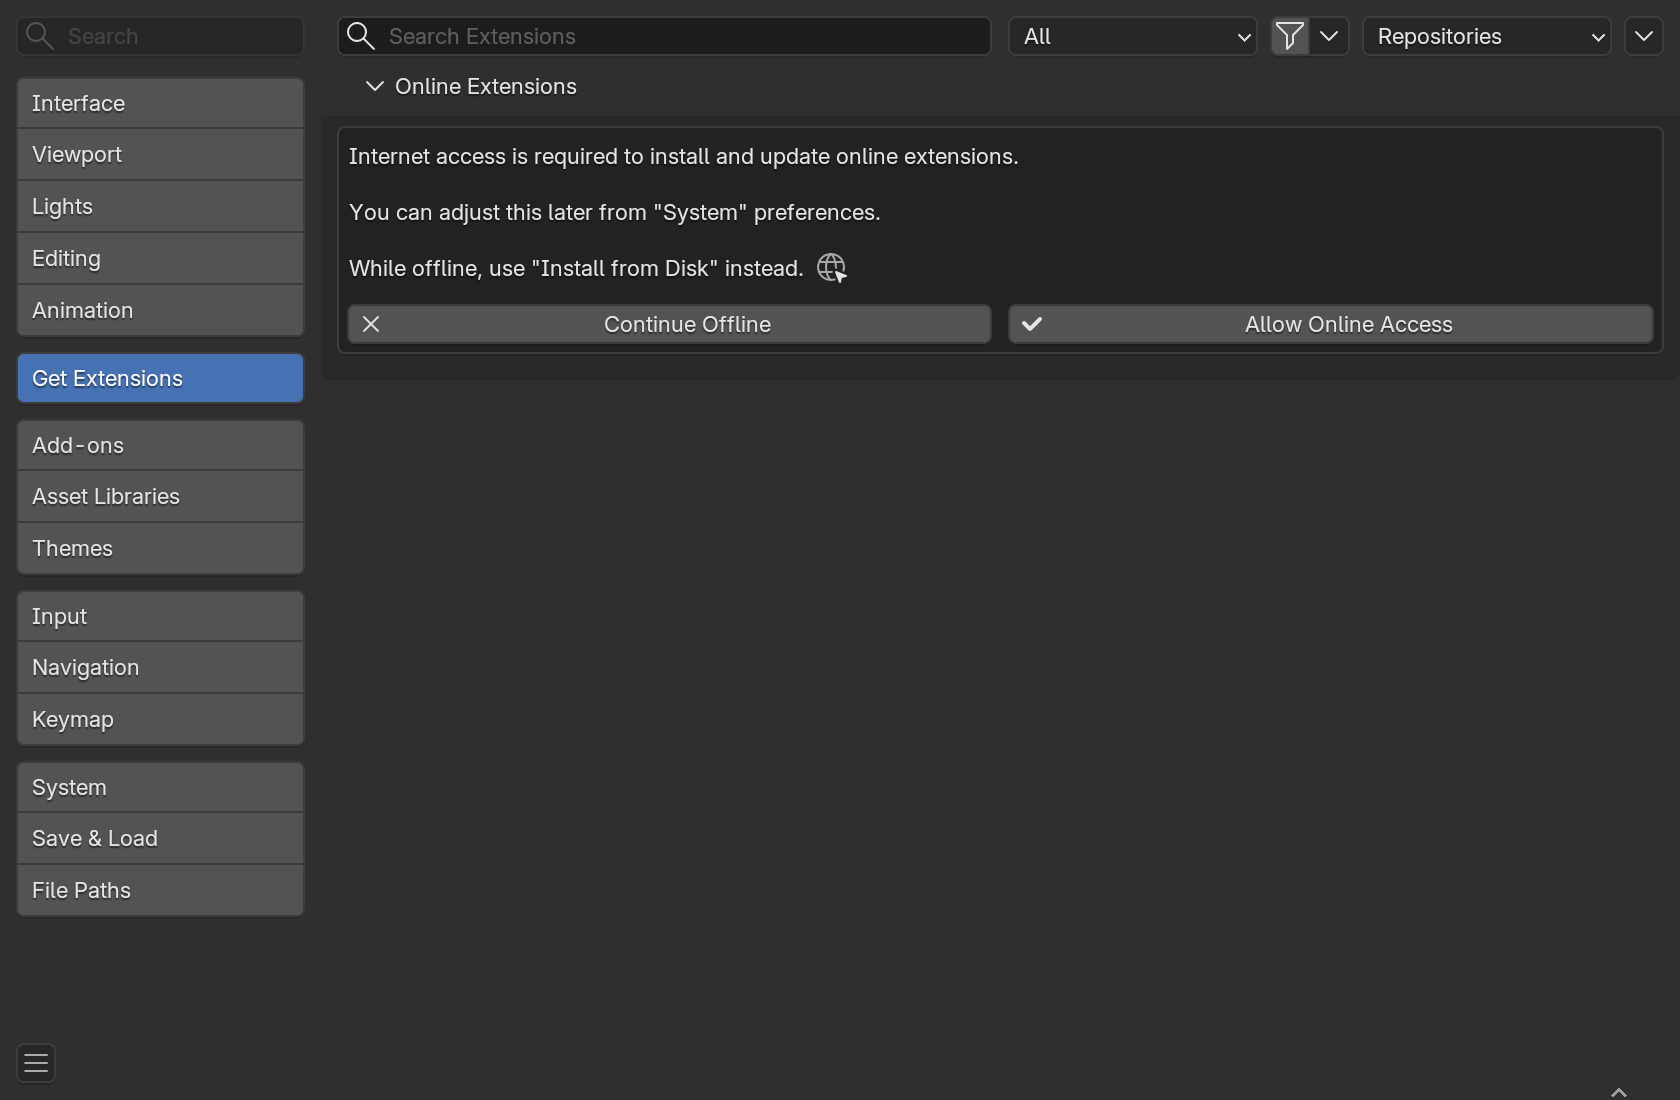
In Blender, open Edit → Preferences and choose Get Extensions on the left. If Blender asks about online access, click Allow Online Access.
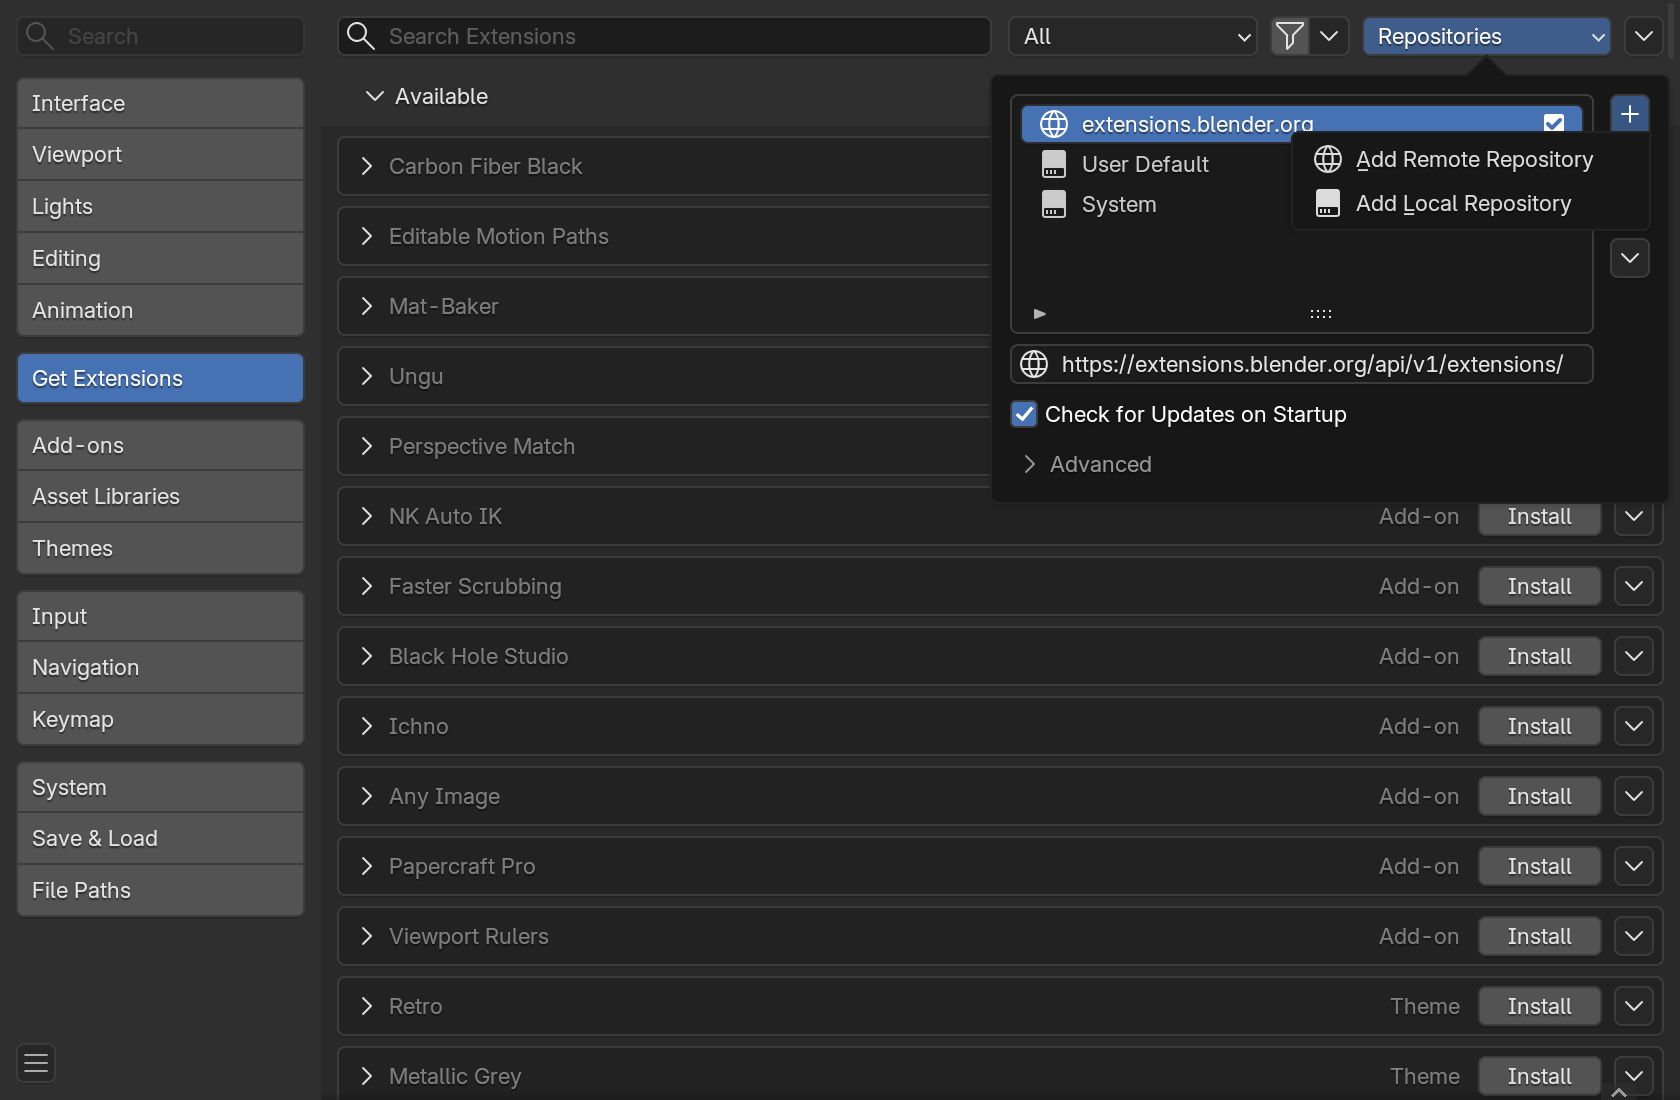
Open Repositories at the top right, then click + → Add Remote Repository.
Paste this address into the URL field and click Create. With Check for Updates on Startup on, Blender tells you about a new version when it opens.
https://vcam.vibeproduction.ai/blender/index.json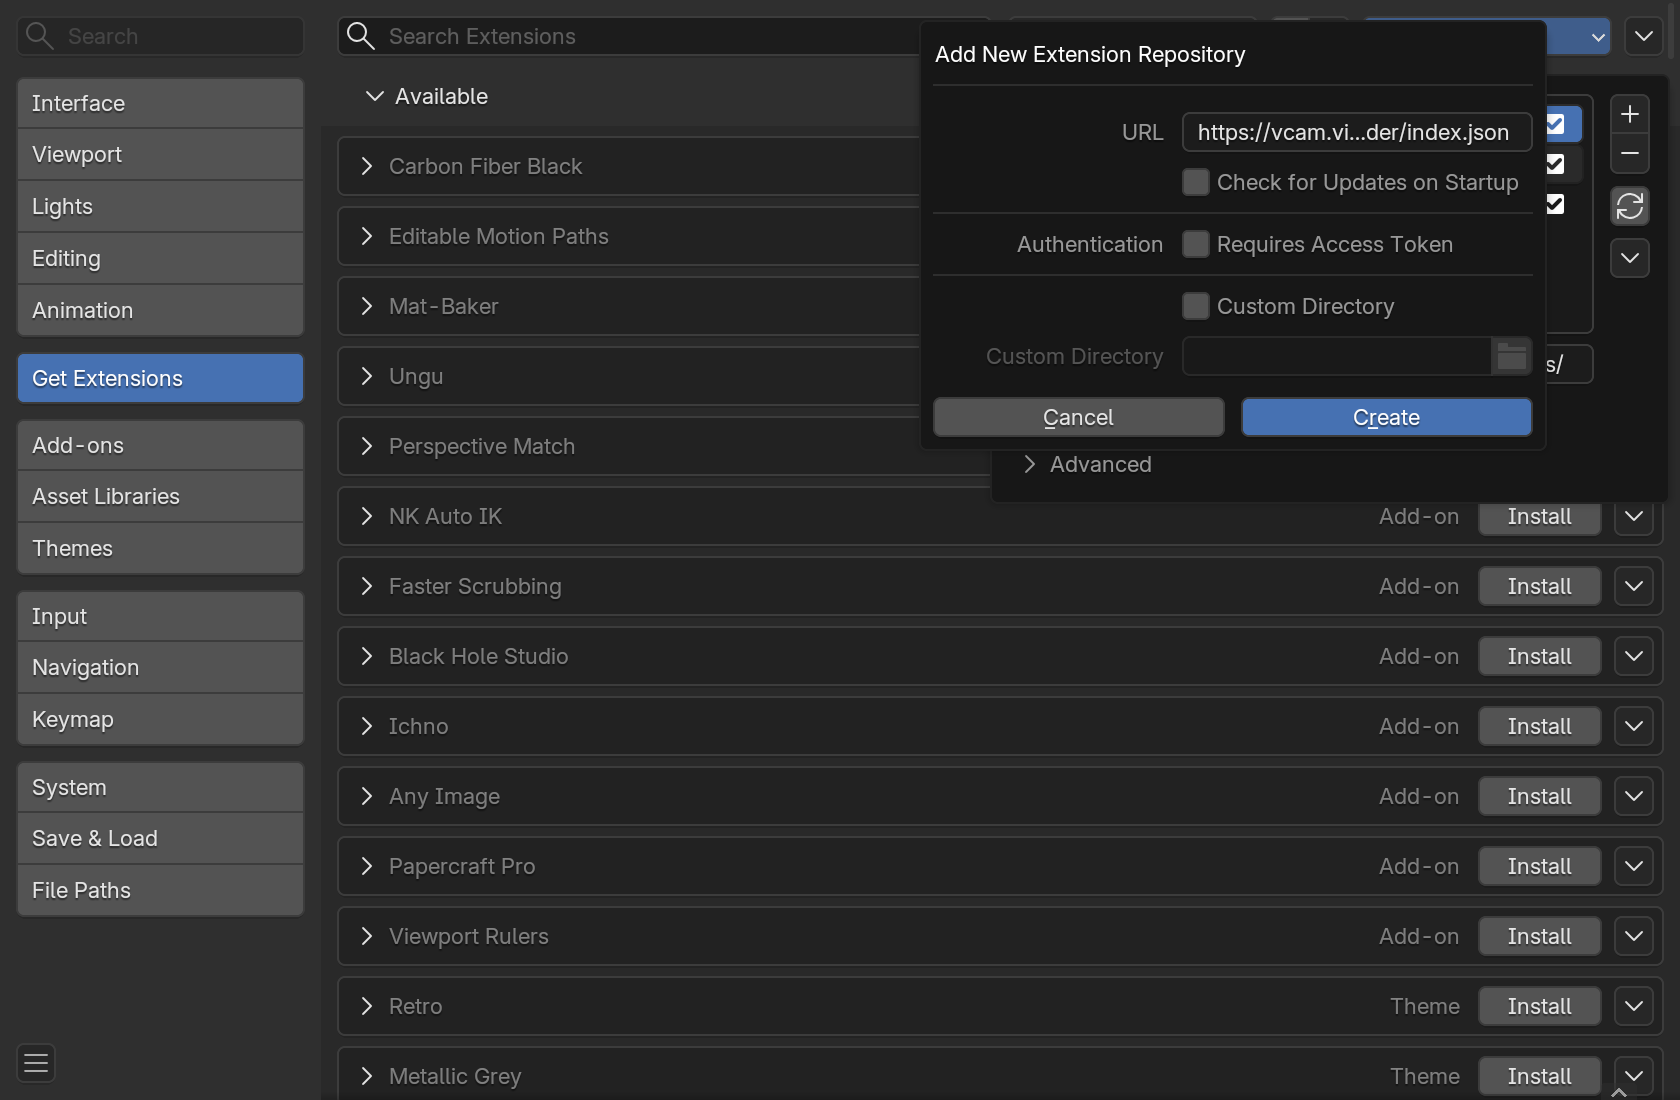
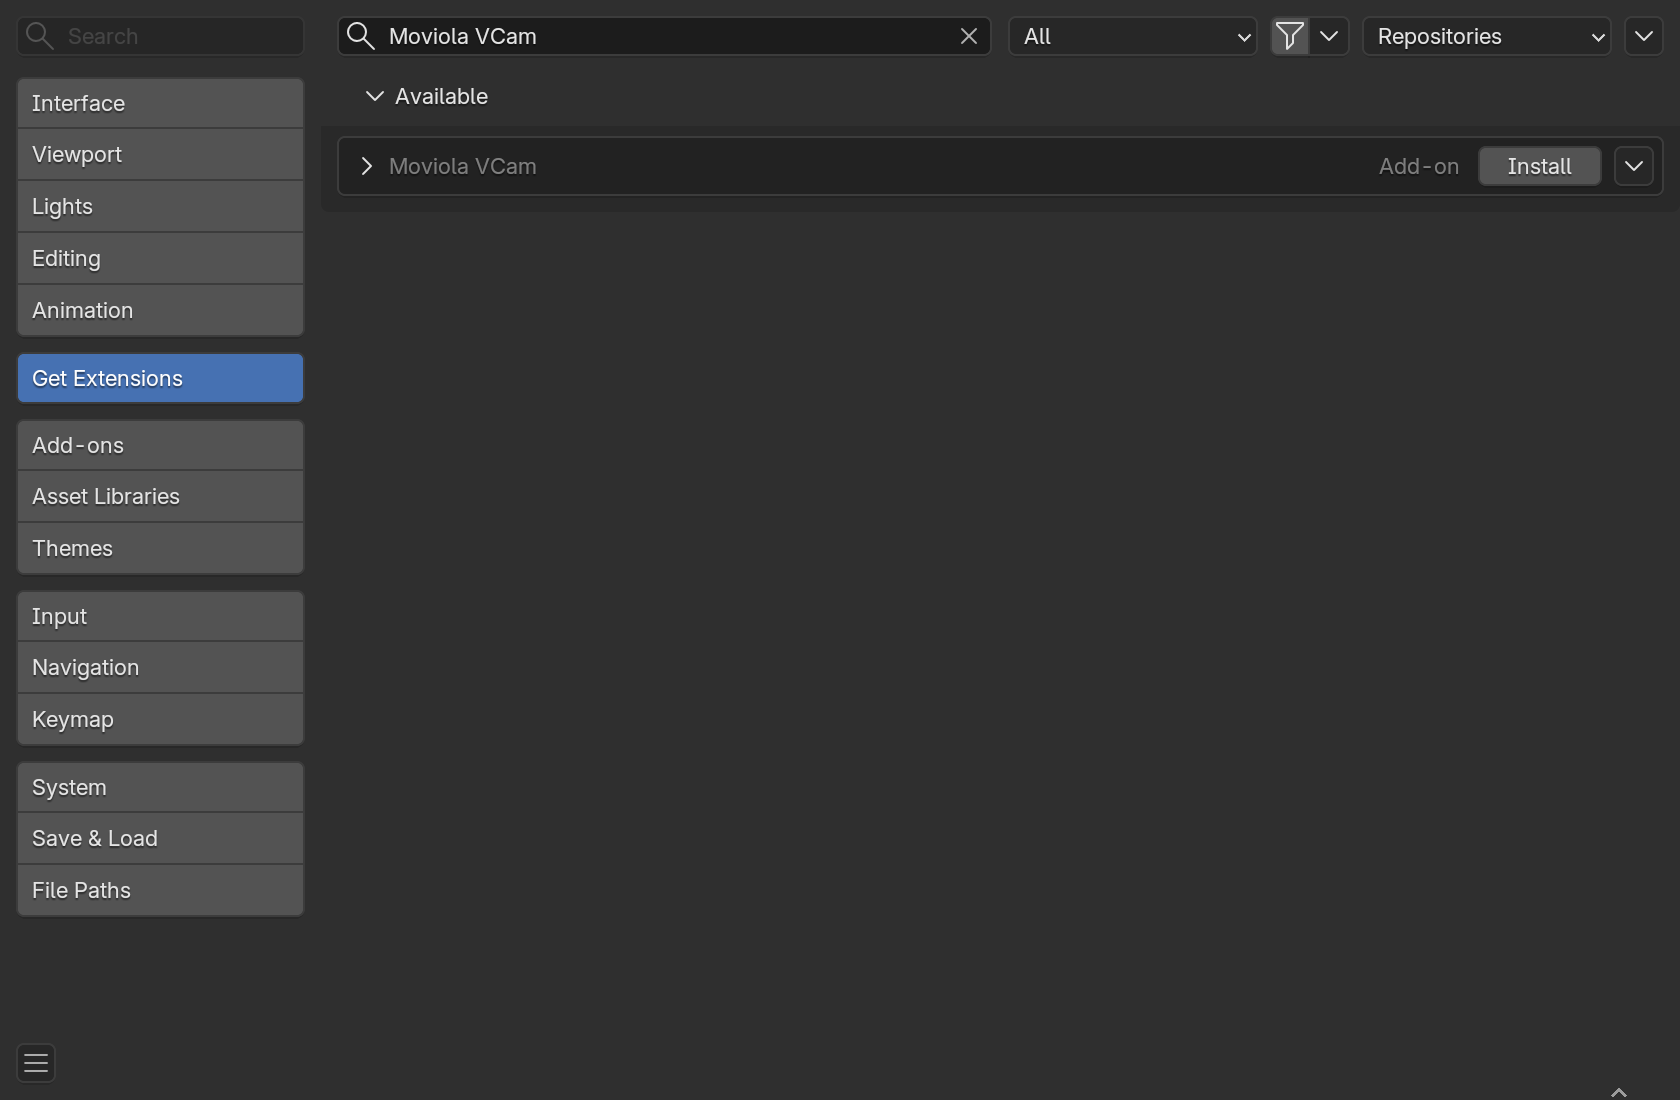
Click outside the list to close Repositories. Type Moviola VCam in the search field and click Install.
For a new version, click Update on the same Get Extensions screen.
If you cannot add the repository
Download moviola_vcam-0.0.10.zip (Apple Silicon, Blender 5.2 or later). In Get Extensions, choose Install from Disk from the menu at the top right and pick the downloaded file. Leave it zipped. Signed and notarized by Apple. Installed this way, a new version has to be downloaded from this page again.
2Get the app on your iPhone

For now the app is a beta distributed through Apple's TestFlight. It is not on the App Store yet.
- On your iPhone, get the TestFlight app from the App Store.
- Point the iPhone camera at this QR and install Moviola VCam from the page that opens.
Reading this on your iPhone? Tap here.
3Go back to MOVIOLA
- Return to the MOVIOLA tab and download the connection file from Connect VCam.
- Open the downloaded file on your Mac. Blender shows the server and the Scene it will connect to, and sends nothing until you check them and click Connect and open.
- In the iPhone app, tap Connect, scan the QR in Blender's sidebar (N), then tap Go Live.
Keep the Mac and the iPhone on the same Wi-Fi, and allow local network access for both apps.